Install Android Emulator on VPS
An Android emulator is software that creates a virtual Android device on your computer, allowing you to run Android apps and games without needing an actual Android phone or tablet. These emulators can be beneficial for testing an Android app or game on a PC prior to any final production. Or they can used for personal projects that may need the apps and games developed inside Android systems.
Another effective way to use the full power of Android emulators is by having them installed on a virtual private server (VPS). This can improve performance and prevent you from overloading your local resources.
-
- Why use an Android emulator?
- Benefits of using Android emulators on VPS
-
Install NoxPlayer on Windows VPS on VPSServer without GPU
- Select custom in the initial setup interface
- Select install after selecting custom
- Turn off the software after the installation is complete
- Open multi-srive on the screen
- Select the icon button for the setting
- Configure NoxPlayer without GPU
- Complete NoxPlayer installation on Windows VPS without GPU
- Install Bluestacks on Windows VPS without GPU
- Common issues and troubleshooting
This comprehensive guide will show you exactly how to install an Android emulator on a VPS server. We will first consider the benefits of using a VPS for emulation due to scalability and control over your performance. In the next section, we will discuss requirements, as well as a bit of pre-setup and preparation, such as choosing a VPS provider to host your setup.
Afterward, you will learn how to install some popular Android emulators, BlueStacks and NoxPlayer, on VPS. If you are a newbie to VPS and emulation, every step is well explained so you can easily follow along.
By the end of this guide, you will have a fully functional Android emulator capable of a wide range of tasks, from app testing to gaming, on your VPS. Whether you're a developer seeking to test your apps on diverse platforms or a gamer craving superior performance and a larger gaming screen, this guide is tailored for you. So, let's dive in and configure your Android emulator on a VPS!
Why use an Android emulator?
![]()
With mobile applications' rising prominence in the digital world, there is an escalating need for robust and adaptable tools to test, run, and enjoy them on multiple platforms.
An Android emulator serves as a critical tool, allowing users to simulate Android devices on non-Android systems such as PCs or Macs. It's like having a mobile device on your PC or Mac, making your digital experience more comfortable and enjoyable.
By utilizing an Android emulator, developers, gamers, and technology enthusiasts can significantly improve their productivity and enjoyment.
One significant benefit of employing an Android emulator is its compatibility with the current trend of virtualization technology. This trend is transforming how we interact with software and hardware, offering more flexible and efficient solutions for diverse computing needs.
Great solution following the trend of virtualization technology

In the computational environment nowadays, virtualization is a cornerstone that enables resource efficiency and fosters computing scenarios. An excellent example of this is Android emulators, which make it possible to emulate Android. Its tight integration allows all the hardware speculations across many platforms, even on VPS.
Utilizing an Android emulator VPS allows users to operate Android applications while leveraging the server's robust performance and dedicated resources. This setup is especially advantageous for developers and testers who require multiple instances of Android applications without relying on physical devices.
Virtualization technology provides a dynamic and scalable approach for operating Android emulators VPS. A VPS can create isolated environments that replicate the functionality of physical Android devices, facilitating seamless development and testing. This strategy is not only cost-effective but also improves the efficiency of running Android applications.
Moreover, deploying an Android emulator on a VPS enhances hardware resource allocation, making it easier to manage and deploy multiple virtual Android devices efficiently.
Integrating Android emulators with VPS infrastructure combines the strengths of both technologies: the stability of a virtual private server and the versatility of Android applications. This setup is particularly beneficial for game developers and app testers, as it provides a smooth workflow and a reliable testing environment.
Leveraging Android VPS's capabilities enables the simultaneous running of multiple applications and instances, boosting productivity and ensuring comprehensive application testing.
How Android emulators on VPS transform your gaming experience

Installing Android emulators on a VPS gives you a unique perspective to play games from your own server. This arrangement provides users with the ability to enjoy their favorite games on a more reliable and robust plinth.
With the increased power of Android VPS, gamers can achieve higher performance than traditional internet gaming, which actually helps with reduced latency and overall better graphics, leading to a more immersive experience. With the flexibility of the VPS Android emulator, you can run multiple android emulators at once and simultaneously manage different games/accounts with great ease. One of the main benefits of utilizing Android VPS gaming is that limits have been stiffed due to physical devices.
A VPS with top-tier hardware like NVMe SSD storage and generous RAM can provide plenty of power for a perfect gaming experience. Moreover, since the Android VPS resources are dedicated to you, we no longer have issues such as overheating or low battery with physical Android devices.
A VPS Android emulator software provides a secure and isolated environment for gaming. This setup allows you to install and test various emulator software without compromising the security of your primary device. With complete root and administrative access on Android VPS, you have total control over your gaming environment. This control enables you to customize settings and optimize performance to meet your preferences.
Overall, using Android VPS server gaming delivers a superior experience. It merges the power of virtualization with the flexibility of playing Android games applications, all within a safe and protected environment.
Benefits of using Android emulators on VPS

If you apply Android emulators on a VPS, there are multiple benefits aligned with it that can give you a butter-smooth experience in running Android apps and games. The greatest of it all is the better performance and scalability provided by a VPS. Android VPS is not limited to the resources available on your local machine, so you can use more CPU and RAM (storage), which will allow you to run android emulator software properly without causing harm.
This allows people to take advantage of quicker load times and less lag, which is a good thing, especially when gaming on Android or using heavy resource apps.
Another considerable advantage is the cost savings of using an Android Emulator VPS for development and testing. Developers can forgo the cost of keeping up with different physical gadgets by using a VPS.
On the other hand, they can utilize a high-end VPS to launch numerous Android emulators while testing their apps over diversified versions of Android and device setups. This saves time and money and simplifies the testing process by allowing you to detect what is wrong before planning a release.
Secondly, VM isolations and security are enhanced when using Android emulators on VPS. The operating environment of a VPS is isolated so that apps can be tried out without compromising the main OS. This ensures that the Android apps are isolated: any security vulnerabilities or bugs in those containers do not reach the core system.
Moreover, an Android VPS has inherent security benefits through the protection provided by your hosting provider, enabling another layer of safety to development and testing operations. In conclusion, an Android emulator VPS is a robust and scalable solution for running Android emulators from any location with secure access, which makes it suitable for both developers and gamers.
Enhanced performance and scalability

When using a VPS to run Android emulators, two things that get an immediate boost are performance and scalability. Unlike physical devices, a VPS can be upgraded in minutes by adding additional resources such as CPU, RAM, and storage. This flexibility ensures that the Android emulator runs smoothly, even with more demanding applications. Developers can quickly customize the resources they need, providing an efficient way to manage failover resources and optimize performance.
Moreover, a VPS's enhanced scalability allows it to execute demanding tests without encountering typical lags or server performance problems. This capability is crucial for developing resource-heavy apps, as it ensures consistent and reliable performance throughout the testing phase. By leveraging a VPS, developers can maintain high levels of efficiency and productivity, ensuring their applications meet the highest standards before deployment.
Cost-effective solution for development and testing

Deploying a good quality Android emulator allows developers to save significantly on expenses that would otherwise go towards purchasing expensive smartphones for development-centric activities such as creating new applications or testing app behaviors in various real-life scenarios.
By utilizing emulators, resources that would be tied up in multiple physical devices are freed, providing scalable instances for extensive testing and development at a much lower price. This approach scales down initial investments and reduces associated support costs by outsourcing much of the hardware management to VPS providers.
Using a VPS for Android emulation, developers can minimize overheads and redirect funds to the most critical parts of their projects. Opting for a VPS over a collection of physical devices, which can soon become outdated and demand frequent upgrades, presents a more sustainable and economical solution.
VPS-hosted emulators provide the flexibility for developers to quickly scale their testing environments according to project requirements, eliminating the significant initial expenses and continuous maintenance tied to physical hardware. This financial efficiency is crucial for startups and small development teams working with limited budgets.
Increased Security and Isolation

Using a VPS to run Android emulators enhances security and isolation, making it an excellent option for developers and testers focused on data protection. VPS environments are crafted with security as a priority, providing dedicated resources and isolated instances that protect your data and applications from potential threats.
This separation is what makes an instance run in singleton mode. It will work on its own and contain this little container without being allowed access from other instances, hence decreasing the chances of insecurity.
In addition, Android VPS providers usually have robust security measures like firewalls in place to keep your hosted site safe from prying eyes, as well as any regular updates or monitoring, which helps them catch a lot of potential vulnerabilities. This additional layer of security helps to secure your development and test environment while keeping all sensitive data private. Leveraging Android VPS emulators offers a secure, stable, and isolated setting, essential for preserving the integrity and security of your applications.
Install NoxPlayer on Windows VPS on VPSServer without GPU
![]()
The minimum configuration to set up Nox on a Windows VPS from VPSServer is no dedicated GPU. NoxPlayer is a popular Windows-based Android emulator that plays different Android apps and games on Windows PCs.
It is very efficient in utilizing a VPS's resources and can work fine with things like no GPU, which makes it good if you want to emulate Android environments on your server. VPSServer stands out as one of the best VPS providers for this purpose, offering robust performance, scalability, and reliable support for running Android emulators like NoxPlayer and BlueStacks.
Before diving into the detailed steps, ensure that your Windows VPS meets the basic system requirements. This includes having sufficient RAM and CPU power to handle the emulator's operations. VPSServer's flexible plans and high-performance hardware make it an ideal platform for running resource-intensive applications like NoxPlayer or BlueStacks.
An Android VPS on VPSServer can efficiently handle Android applications without needing a dedicated GPU, ensuring smooth and reliable performance. To achieve the best performance and most secure experience, you need to stay updated with your software updates and security patches on a Windows VPS.
Now install the prerequisites and start the installation. This includes selecting custom installation options and configuring the emulator settings to ensure it operates efficiently without a GPU. This process ensures that your Android emulator VPS setup is tailored to your specific needs, maximizing performance.
The following steps will guide you through the installation and configuration of NoxPlayer on a Windows VPS from VPSServer, enabling you to run Android apps efficiently. By leveraging VPSServer's robust infrastructure, you can create a powerful Android VPS environment capable of handling various Android emulators, including both NoxPlayer and BlueStacks.
Select custom in the initial setup interface

When installing NoxPlayer on a Windows VPS, the first step is to select the custom option in the initial setup interface. This option allows you to configure the installation settings according to your specific needs. Choosing a custom installation is particularly important for users who want to optimize NoxPlayer to run without a GPU, ensuring that the Android emulator functions smoothly on a VPS. By selecting custom, you can control various aspects of the installation process, including the installation directory and additional settings that might be necessary for a VPS environment.
Opting for the custom installation allows you to tailor NoxPlayer's setup to better align with the specific resources and limitations of a VPS. For instance, you can avoid installing unnecessary components that may not be useful or could hinder performance on a VPS without a dedicated GPU. Additionally, this method provides the flexibility to specify a preferred installation path, which can be particularly useful if you are managing storage allocation carefully on your VPS. Overall, selecting the custom option ensures that NoxPlayer is configured most efficiently and effectively for your particular VPS setup.
Select install after selecting custom

After choosing the custom option, the next step is to proceed with the installation by selecting the install button. This action initiates the NoxPlayer setup process on your Virtual Private Server. For NoxPlayer to be installed correctly, it is essential to heed all the instructions displayed on the screen. Depending on your VPS specs, the installation will likely take a few minutes. During this phase, the installer will copy the necessary files and configure the Android emulator to operate without a GPU, ensuring compatibility with your VPS setup.
Turn off the software after the installation is complete

After the installation, it's crucial to turn off NoxPlayer before proceeding with further configurations. This step ensures that all installation processes are finalized, no background tasks are running, and any temporary files created during the installation are cleared. It's a key practice to avoid conflicts or errors during the subsequent configuration steps.
Turning off the Android emulator at this stage is not just a step; it's a practice that can prevent potential issues and contribute to the overall stability and performance of the emulator. It allows the system to refresh and apply any updates or changes made during the installation, providing a smoother experience as you move forward with the configuration and use of NoxPlayer on your VPS.
Open multi-srive on the screen
The next step in configuring NoxPlayer on your Windows VPS is to open the Multi-Drive feature. It allows you to install multiple instances of NoxPlayer on your computer and have all those different virtual devices open and running at the same time for testing! Multi-Drive opens from the NoxPlayer start menu. This interface will enable you to add new instances, configure settings, and optimize the Android emulator to run without a GPU.
In the Multi-Drive interface, you can see options to add new instances, manage existing ones, and adjust various settings to ensure optimal performance. This feature is invaluable for developers and testers who need to work with multiple Android environments concurrently.
Select the icon button for the setting

In the Multi-Drive interface of NoxPlayer, you will find an icon button labeled 'Settings.' This button is crucial for configuring the Android emulator to run efficiently on your VPS. When you select this button, it opens up a range of configuration options. These options include adjusting the CPU and RAM allocation, setting the screen resolution, and optimizing performance.
Properly configuring these settings is essential, especially on a Virtual Private Server without a dedicated GPU, as it ensures that NoxPlayer runs smoothly and efficiently. By fine-tuning these options, you can significantly enhance the emulator's performance, leading to a better and more responsive user experience.
Configure NoxPlayer without GPU
Follow these steps to configure NoxPlayer without a GPU. By the end, you'll have a NoxPlayer that's optimized for your VPS and running smoothly and efficiently.
CPU and RAM allocation: Open NoxPlayer and navigate to the settings menu. Allocate sufficient CPU cores and RAM to the emulator. This setting ensures that NoxPlayer gets the CPU cycles and memory it needs to run Android apps smoothly. More CPU cores and, of course, more RAM can increase performance by quite a factor, especially on a very small VPS.
Adjusting resolution and frame rate: Customize resolution and frame rate settings to meet your VPS capabilities. Reducing these settings can improve Android emulator performance. Navigate to the "Advanced" settings tab in NoxPlayer and set a lower resolution and frame rate that suits your VPS specifications. This step is crucial for ensuring smooth operation without overloading your system.
Complete NoxPlayer installation on Windows VPS without GPU
After configuring the necessary settings, the final step is to complete the installation of NoxPlayer on your Windows VPS. This involves saving all the configuration changes you made to ensure the emulator runs smoothly without a GPU. Once these settings are saved, restart NoxPlayer. This restart allows the emulator to apply the new configurations and optimize its performance for a Android VPS environment lacking a dedicated GPU.
Upon restarting, NoxPlayer should now be fully optimized for your VPS setup. You can then proceed to install and run Android apps seamlessly without any hiccups. This setup allows you to leverage the power and flexibility of your VPS, ensuring a smooth and efficient virtualization experience without the need for a GPU. Enjoy the benefits of using NoxPlayer in this optimized environment, which provides a robust platform for various Android applications.
Install Bluestacks on Windows VPS without GPU

Setting up BlueStacks on a Windows VPS without a GPU is straightforward, enabling the seamless running of Android apps on a virtual server. While BlueStacks VPS typically benefits from GPU acceleration, it can still be effectively installed and used on a VPS without a dedicated GPU. This setup is suitable for both developers and anyone who needs to test Android apps on their computers.
Ensure you are running a 64-bit version of Windows at least with the bare minimum profile to install BlueStack application, which requires at least higher than or equal to 4GB RAM and disk space greater than five gigabytes on your Windows VPS before starting processing BlueStacks VPS application. Virtualization, however, needs to be turned on in your VPS BIOS settings, which is also relatively straightforward and can be set via your provider's control panel.
Step-by-step guide to Installing BlueStacks on Windows VPS:
Download and Launch Installer: Download the BlueStacks setup from the official source and start the installation. The installation interface is intuitive and provides step-by-step guidance, such as accepting the software license terms and selecting the desired installation directory.
Automatic configuration: BlueStacks VPS automatically configures the necessary settings for optimal performance on a VPS without a GPU, including adjustments to memory allocation and CPU usage.
Initial Setup: Once installation is complete, BlueStacks VPS launches the initial setup, where you can link your Google account to access the Google Play Store and download Android apps directly to your VPS Android emulator.
Installation interface of a BlueStacks instance
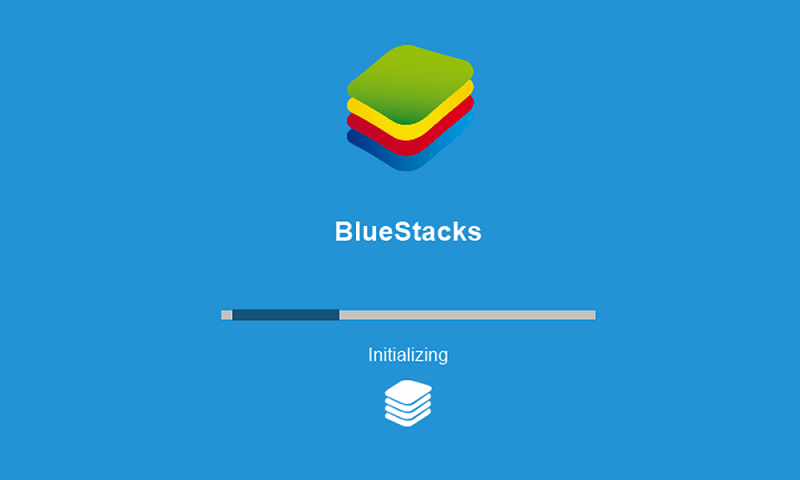
The BlueStacks installation screen is straightforward and user-friendly, so even non-tech geeks can easily install it. When you fire it up, the installer presents a welcome screen advertising the benefits of BlueStacks VPS as an Android emulator running on one's VPS.
The interface offers step-by-step guidance on the installation process, such as agreeing to the software license terms and selecting the desired installation directory. As the installation progresses, BlueStacks VPS automatically configures the necessary settings to ensure optimal performance on your VPS.
This includes adjustments to memory allocation and CPU usage to compensate for the lack of a dedicated GPU. The installation interface also provides visual indicators of progress, ensuring that you are informed of each step. Once the installation is complete, BlueStacks VPS launches the initial setup, where you can link your Google account to access the Google Play Store and download Android apps directly to your VPS Android emulator.
Overall, the installation interface of BlueStacks makes it easy to install and run Android apps on a VPS without a GPU. By following the guided steps, you can quickly set up a functional Android emulator VPS environment, allowing you to run and test Android apps efficiently. This setup is particularly beneficial for developers and users who need a reliable solution for running Android emulators on virtual servers.
To sum it up, using an Android emulator like NoxPlayer and BlueStacks VPS has many significant advantages, such as performance scalability that will make the engine drive through to lower response time per request or flexibility. If you continue to this guide and set it up step-by-step as I am describing here, then it is 100% guaranteed that cross-platform emulators (android launcher) will work perfectly on VPS in a way of running Android applications/games, etc.
The virtualization technology integrated with the Android emulators introduces a sea of change to developers, testers, and gamers alike, giving them sidelined opportunities on an Android-related activity by providing a sturdy platform indeed.
Common issues and troubleshooting

Running an Android emulator in a VPS is possible but fraught with difficulties that affect both performance and usability. Knowing about these issues and how to troubleshoot them can significantly improve your experience. Users face an issue almost daily that the performance bottlenecks make the emulator damn slow and non-responsive.
Other common problems include the fact that some Android apps will only be partially compatible with this VPS-based emulator setup. To solve these problems, there are specific steps to follow and best practices you can use to improve the performance of your emulator on VPS.
Performance bottlenecks may be resolved by changing resources provided to your VPS or tweaking emulator settings as well. Incompatibilities typically mean you have to make sure that the emulator and VPS environment are up to spec for whatever app you're trying to run. With these common issues addressed systematically, make the most out of how you use the Android emulator on your VPS to run apps smoothly and efficiently.
So, in the following parts of this section, we will talk about specific troubleshooting ways to resolve them. Talk about performance bottlenecks and what kind of strategies you can adopt to deal with them (These are usually one BIG obstacle while using an Android emulator in VPS). We will also talk about the solutions to the compatibility problem, so your Android apps run smoothly in your VPS environment.
Dealing with Performance Bottlenecks

However, performance is equally important, and to that end, the Android emulator VPS used should ideally have no problem with any of them. The lag or slow response times that users experience while using their Android apps through a VPS Android emulator is one of the most common issues faced on an everyday basis.
This is usually due to the need for more CPU or memory resources provided for the VPS. After upgrading to one with more RAM and CPU cores, the performance of your Android Emulator VPS will be significantly increased. On top of that, you can further reduce the bottleneck by optimizing a few settings in the emulator - for example, lowering the screen resolution or limiting the number of running apps.
Network optimization is also a critical aspect of handling performance bottlenecks. For a VPS Android emulator to use the Android app properly, you need to have a proper fast internet connection. However, if the VPS is hosted in a location that is far away from you, latency means time delay and slow response. Choosing a VPS provider that has data centers near where you are located can reduce latency and improve the speed of your Android emulator VPS. You can also improve performance by configuring network settings inside the emulator and maintaining a dedicated fast internet connection for your VPS.
Finally, using specific Android emulators that are fast on VPS can matter a lot. For example, a lot of people use BlueStacks VPS because the primary aim is to get it to run Android apps in virtualized environments. BlueStacks has a number of settings and features to optimize it for VPS so that your Android virtual emulation environment on the server will work without any failures.
Performance issues can also be avoided by updating both the emulator software and the VPS operating system on a regular basis to maintain compatibility, as well as to take advantage of performance enhancements. By taking action in the areas above, users can overcome and cope with performance bottlenecks of their VPS Android emulators, which will lead to an enjoyable user experience in a smooth manner.
Resolving compatibility problems

When installing an Android emulator on different Virtual Private Server configurations, compatibility issues can frequently arise. These problems often stem from the VPS needing to meet the specific system requirements of the emulator. To run Android apps smoothly, it is crucial to verify that the hardware and software specifications of your chosen VPS support the VPS Android emulator.
Start by comparing the minimum requirements of the emulator with the resources provided by your Android VPS. This includes checking the CPU, RAM, storage capacity, and the operating system version of the VPS. Ensuring these specifications match is the first step in resolving compatibility issues.
Additionally, making necessary adjustments in the VPS settings can help address conflicts that prevent the Android emulator from functioning correctly. This may involve configuring virtual machine settings to allocate more resources to the emulator or adjusting network settings to improve connectivity.
For example, running an emulator like BlueStacks VPS often requires enabling virtualization technology in the VPS settings to enhance performance. By carefully tweaking these settings, you can optimize your VPS Android emulator to run Android apps more efficiently. It's also beneficial to regularly update both the emulator and the VPS to the latest versions to prevent compatibility issues.
Another crucial aspect of resolving compatibility problems involves seeking support and resources from online communities and forums dedicated to Android emulators and VPS configurations. Many users who run Android emulators on VPS have encountered similar issues and can provide valuable insights and solutions.
Engaging with these communities can help you discover workarounds and best practices tailored to your specific emulator and VPS setup. Whether you are using a VPS for running BlueStacks or any other Android emulator VPS, leveraging shared experiences can significantly aid in troubleshooting and optimizing your system to ensure the smooth operation of your Android emulator.
Frequently Asked Questions
What advantages come with setting up an Android emulator on a VPS?
Setting up an Android emulator on a VPS enhances performance, mitigates local resource strain, and delivers a reliable platform for app testing and gaming.
Which Android emulators are recommended for installation on a VPS?
Popular choices include BlueStacks VPS and NoxPlayer. Both offer robust performance and are well-suited for running on VPS environments.
What are the basic system requirements for running an Android emulator on a VPS?
Ensure your VPS has sufficient RAM, CPU power, and storage. Typically, at least 4GB of RAM and adequate CPU cores are recommended.
How do you install NoxPlayer on a Windows VPS without a GPU?
Download NoxPlayer, select custom installation, adjust settings for CPU and RAM, and configure resolution and frame rate to ensure smooth operation without a GPU.
What steps should be taken if the Android emulator is running slowly on a VPS?
Consider upgrading VPS resources, adjusting emulator settings such as lowering resolution, and optimizing network settings to reduce latency.
Why might an Android app be incompatible with a VPS-based emulator?
Compatibility issues often arise from insufficient system resources or outdated software. Ensuring the VPS meets the emulator's minimum requirements and keeping both updated can help resolve these issues.
Can multiple instances of an Android emulator run simultaneously on a VPS?
Yes, using features like NoxPlayer’s Multi-Drive, you can create and manage multiple instances, which is particularly useful for testing and multitasking.
What advantages does a VPS offer for Android gaming compared to local devices?
A VPS provides enhanced performance, reduced latency, better graphics, and avoids issues like overheating and battery drain typical in physical devices.
How can you maintain security and isolation when using an Android emulator on a VPS?
VPS setups emphasize security by offering dedicated resources, isolated environments, and protective solid measures like firewalls to ensure the safety of your data and applications.

A seasoned SEO Content Strategist with over 12 years of experience, skilled in creating and implementing comprehensive content strategies that drive website traffic, engage audiences and increase conversions. Proficient in conducting keyword research, optimizing on-page elements, and crafting compelling content that resonates with target audiences.